Work Orders
System Overview
Work Orders is the central hub for managing all maintenance activities in ALEF 360 CAFM. It enables you to create, assign, track, and complete maintenance tasks across your facilities with full visibility into SLA compliance, workforce utilization, and cost tracking.
Reactive Maintenance
Handle breakdown requests, tenant complaints, and ad-hoc repairs with priority-based routing and SLA tracking.
Scheduled Maintenance
Automate preventive maintenance with configurable frequencies, asset assignments, and checklist-based inspections.
Dispatch & Assignment
Assign technicians via drag-and-drop scheduling, skill matching, and calendar-based workforce planning.
Quick Start Guide
- Navigate to Work Orders: Go to
Sidebar → Work Orders → Work Orders - Create a Work Order: Click + Add Work Order and complete the multi-step form.
- Assign Technicians: Use Dispatch Console or bulk assign from the table view.
- Track Progress: Monitor status changes across Unassigned, Open, In Progress, and Completed tabs.
Core Capabilities
Create, assign, track, and close work orders with configurable workflows from creation to completion.
Track response and resolution times against SLA targets with breach alerts and escalation rules.
Assign technicians based on skills, availability, and location with real-time calendar views.
Attach pre-defined checklists to work orders for standardized inspection and maintenance routines.
Log labor hours, inventory usage, and estimated vs actual costs for financial reporting.
Capture photos, notes, and measurements to document work completion and asset condition.
Module Guide
Navigate key areas of the Work Orders module. Each sub-module provides focused tools for specific maintenance workflows.
View, filter, and manage all work orders with status tabs, bulk actions, and export options.
View Table Details →Calendar-based scheduling and drag-and-drop assignment of work orders to technicians.
Open Dispatch Console →Configure recurring maintenance plans with frequencies, assets, and automatic WO generation.
Manage PPM Plans →Create and manage inspection checklists with configurable task types and frequencies.
Manage Checklists →Define service groups, types, and job types with skills and cost estimations.
Configure Services →Calendar views for preventive maintenance with yearly, monthly, and daily planning.
Open PPM Planner →Key Features
Work Order Table
Navigation Path: Sidebar → Work Orders → Work Orders
The main work order table displays all work orders organized by status tabs.
Status Tabs
| Tab | Description |
|---|---|
| Unassigned | Work orders awaiting technician assignment |
| Open Assigned | Assigned but not yet started |
| In Progress | Currently being worked on |
| Completed | Finished and pending closure |
| Closed | Fully processed and archived |
| Cancelled | Voided work orders |
Default Columns
| Column | Description |
|---|---|
| ID | Unique work order identifier (auto-generated) |
| Status | Current progress stage |
| Category | Type: Reactive, Corrective, Inspection, Breakdown, Scheduled Maintenance, Help Desk, Tenant Request, Other |
| Start Date | Scheduled start date and time |
| Created At | System-generated creation timestamp |
| Due Date | Target deadline |
| Assets | Linked equipment/facility/location/space |
| Priority | Urgency level: Low, Medium, High, Critical |
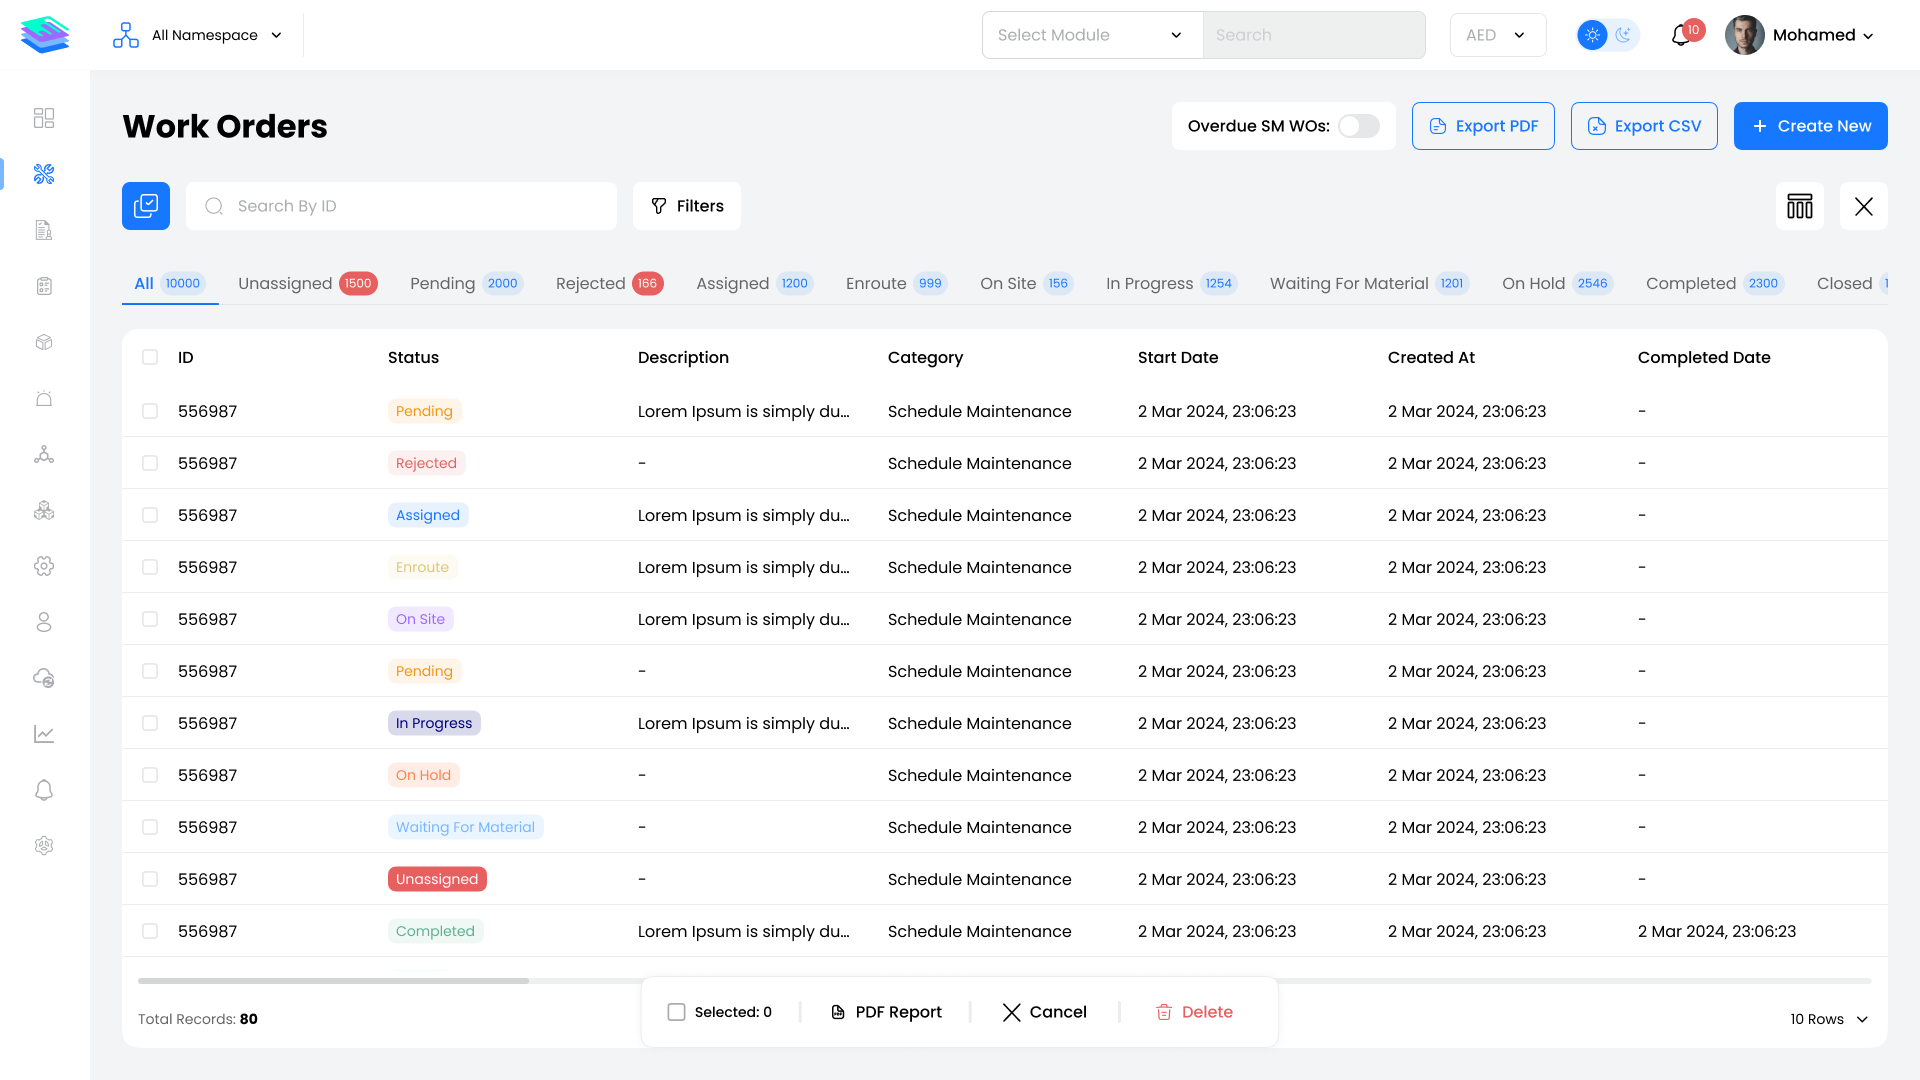
Bulk Actions
Perform operations on multiple work orders at once by selecting items from the table.
| Action | Description | Available In |
|---|---|---|
| Bulk Assign | Assign multiple work orders to users/teams | Unassigned tab |
| Bulk Rate | Add ratings for completed work orders | Completed tab |
| Bulk Close | Mark work orders as closed | Completed tab |
| Bulk Cancel | Cancel work orders | Completed tab |
| Bulk Delete | Permanently remove work orders | All tabs |
| Bulk Download | Export selected work orders as PDF | All tabs |
Steps:
- Click the checkbox icon at the top-left of the table
- Select individual items or use "Select All"
- Choose your desired bulk action
Quick Actions
| Action | Description |
|---|---|
| + Add Work Order | Create a new work order |
| Overdue SM WOs | Toggle to filter overdue scheduled maintenance |
| Export PDF | Generate work order summary reports |
| Export CSV | Export work order data as spreadsheet |
Filters
Click the Filters button to filter work orders by:
- Work Order ID
- Category
- Priority
- Assets
- Assigned Users
- Date Range
- SLA Status
- Customer/Contract
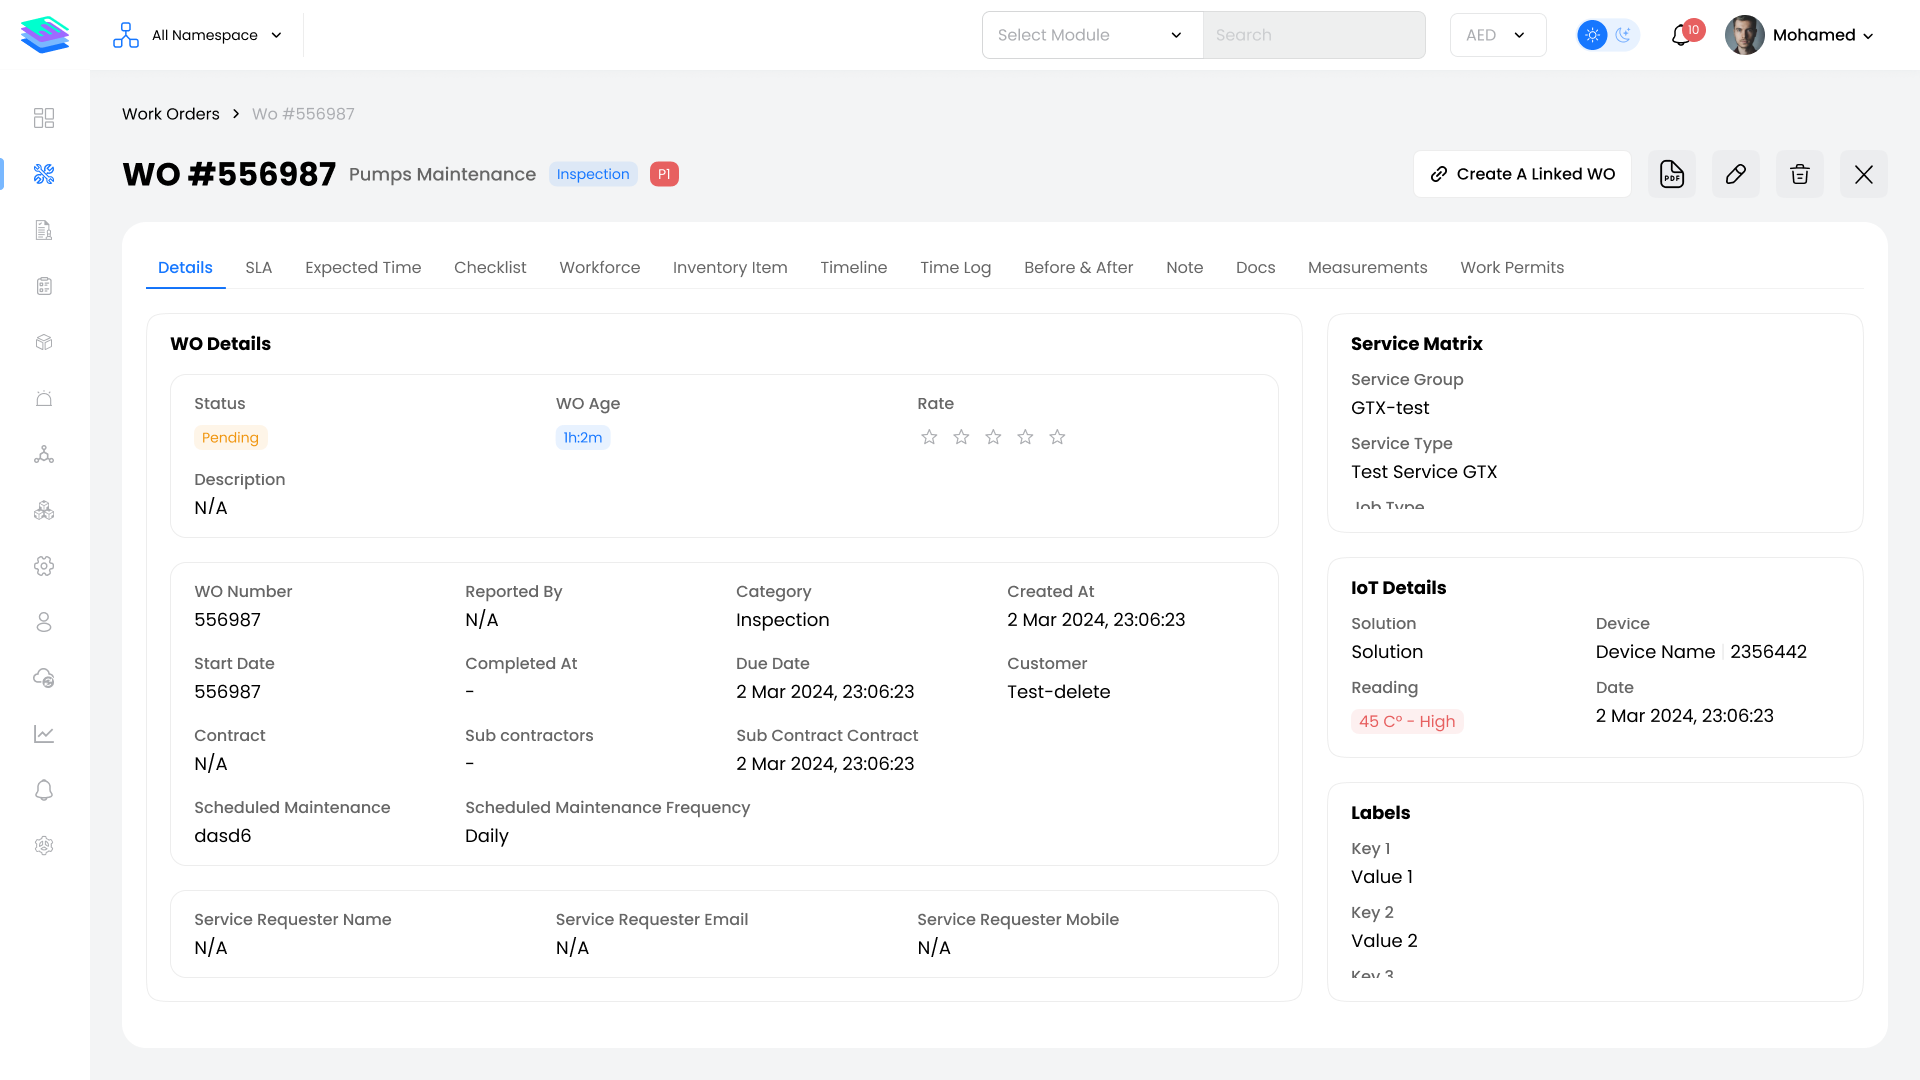
Work Order Profile
Click any work order row to open its detailed profile page with the following tabs:
Details Tab
- Work order information: ID, Status, Category, Priority
- Dates: Created, Start, Due, Completed
- Description and service job details
SLA Tab
- SLA terms and target times
- Breach status and escalation history
Checklist Tab
- Linked inspection checklists
- Task completion status
Workforce Tab
- Assigned technicians
- Acceptance and rejection history
Inventory Tab
- Materials and parts used
- Cost tracking
Timeline Tab
- Activity log and status changes
Time Log Tab
- Labor hours tracking
- Start and end times
Before & After Tab
- Photo documentation
- Condition comparison
Notes Tab
- Internal notes and comments
Documents Tab
- Attached files and reports
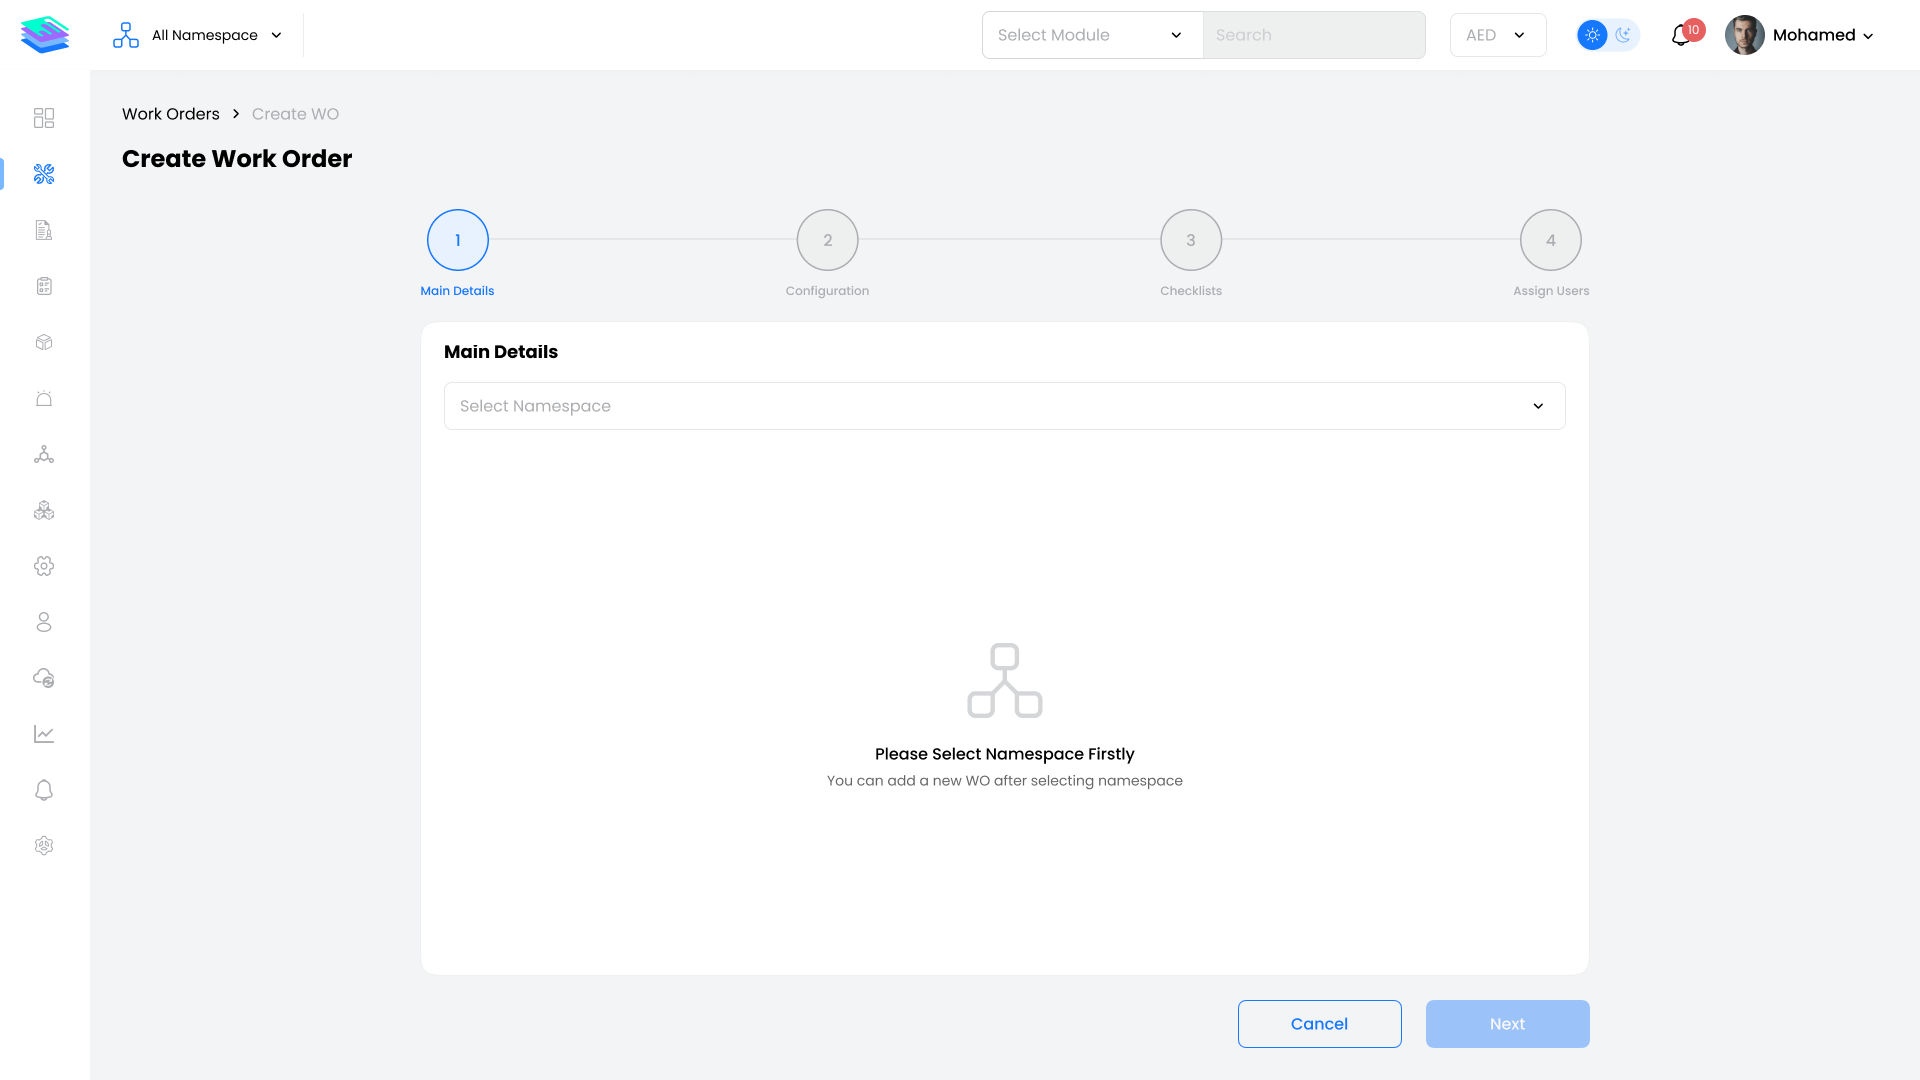
Add Work Order
Click + Add Work Order to open the multi-step creation form.
Step 1: Main Details
- Namespace selection
- Work order category
- Description
- Asset selection
- Service matrix (Group → Type → Job)
Step 2: Assignments
- Customer contract and SLA
- Subcontractor details (if applicable)
- Assigned technicians
Step 3: Settings
- Priority level
- Start and due dates
- Geolocation requirements
- Client sign-off settings
Step 4: Checklist
- Attach pre-defined checklists
- Configure task requirements
Step 5: Review & Create
- Review all details
- Submit work order
Edit Work Order
- Open the work order profile
- Click the Edit button
- Modify fields as needed
- Save changes
Note: Some fields may be locked based on work order status.
Export Options
PDF Export
- Click Export PDF from quick actions
- Select row range
- Apply filters if needed
- Click Export
CSV Export
- Click Export CSV from quick actions
- Choose columns to include
- Click Download